01 · Initialize
Start the camera
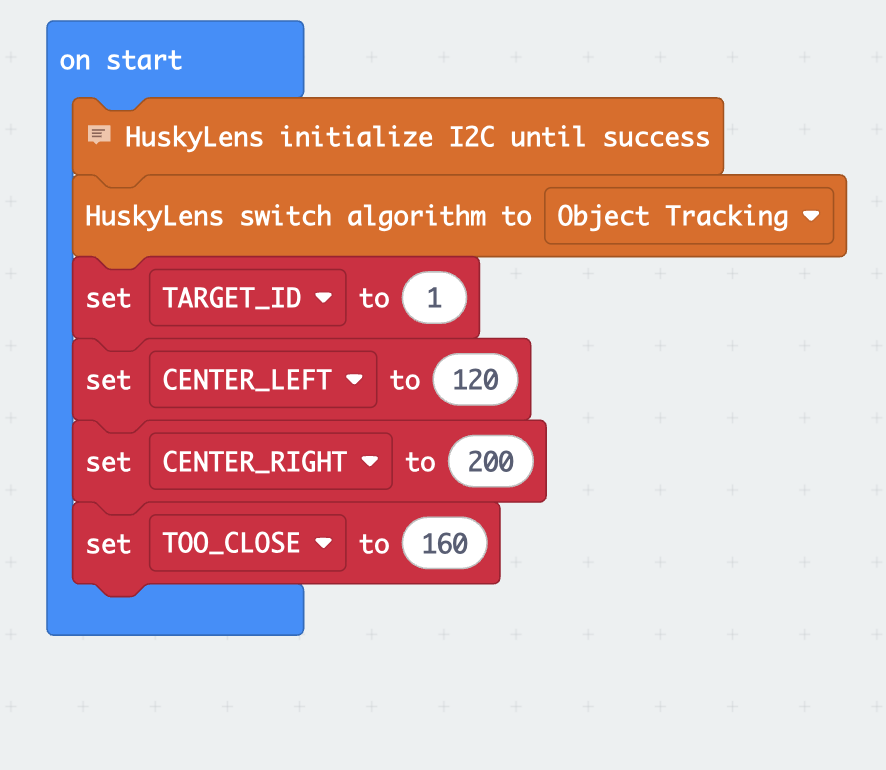
Connect HuskyLens over I2C, select object tracking, and set the target and safety thresholds once.
A clear 45-second walkthrough of the exact MakeCode logic behind a HuskyLens-guided m:bit car.
These are exported from the verified MakeCode workspace. The block shapes are never redrawn or approximated.
Connect HuskyLens over I2C, select object tracking, and set the target and safety thresholds once.
The forever loop requests a new frame and reads the learned target’s ID, horizontal center, and width.
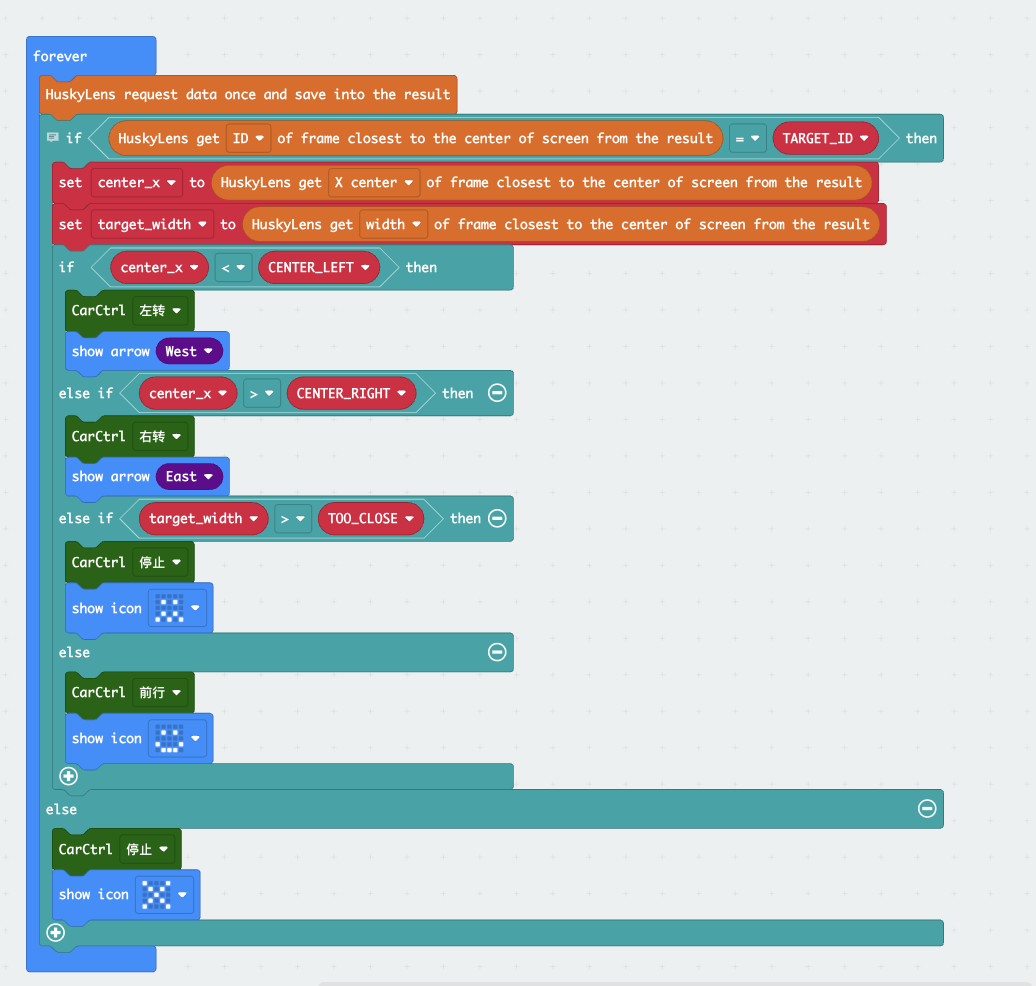
The order matters: verify the target, steer by X, stop when width exceeds 160, then run forward.
The car follows the same branch order as the verified Python and Blocks project.
No learned target means no movement.
CAR_STOPThe target is left of the safe center zone.
CAR_LEFTThe target is right of the safe center zone.
CAR_RIGHTA wide target is near, so the car brakes.
CAR_STOPThe target is centered and still at a safe distance.
CAR_RUNBuilt as a summer-school exploration, the project uses pinned Mbit and HuskyLens extensions and keeps every original decision branch.
Download the source or compiled HEX, then open the MakeCode editor to inspect, change, and test every branch.